
Hello friends!
Welcome back to my blog. If it’s your first time here, please subscribe over in the sidebar to be notified of new posts! 🙂
I have been chipping away at my courses for the Altenew Educator Certification Program and I have another card to share for Level 2. The course I’ve been taking, called Beautiful Details, focuses on adding extra details to cards and specifically to stamped images to make them your own and amp up their impact! I absolutely loved this class and learned sooo much.
The technique I am using is to stamp layered images and then add extra shading and depth and details with colored pencils – it makes a huge difference!
I started by stamping the bloom from the Beautiful Day layering set. I did not use the outline stamp – just the three layer stamps. I used Blush, Rouge, and Coral Berry inks. I stamped the same flower 4 times so that I could experiment and practice with my colored pencil details.
Flower #1 is simply stamped with the 3 layers. Flower #2 is also just stamped but I double stamped the base layer with blush to make it a touch more visible…. but then on flower #3 I added details with colored pencil to help define the curls of the petals and deepen the shadows between petals. On flower #4 I added even more colored pencil details and went even darker in some of the shadows. I was amazed at the different looks I could achieve and how much more 3D I could make the flowers look! wow!

I used Prismacolor pencils (you can see my swatches on the page as I was testing out the colors) which worked great over my inks. The outline stamp adds in the stamen in the center of the flower… I decided to just leave those out because I didn’t want to mess up all the coloring I had done so I just left them as-is.
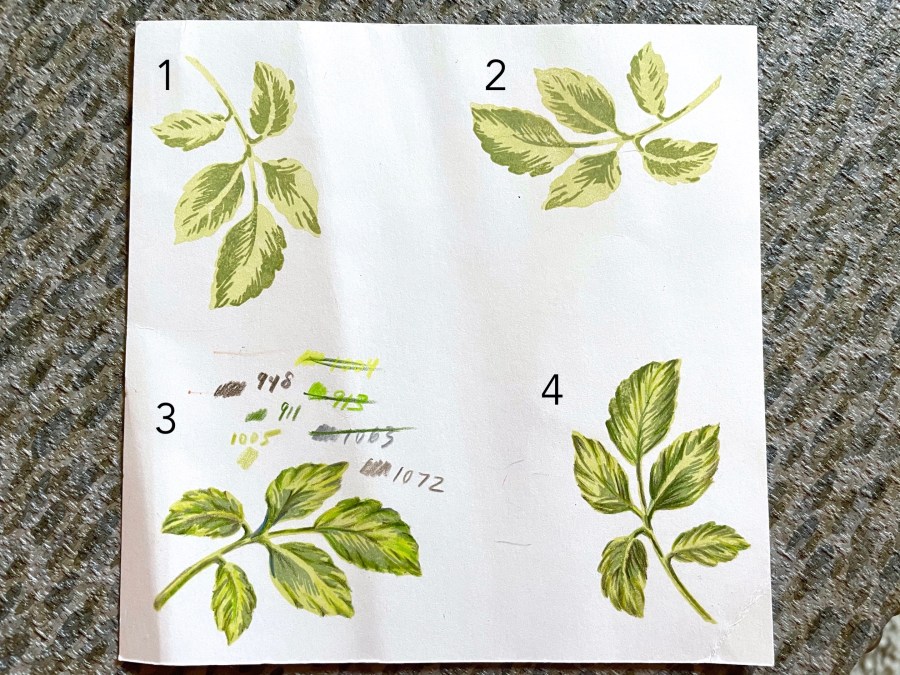
I used the same technique for the leaves from the same stamp set.
Leaves #1&2 are stamped with two layers (I omitted the outline stamp again). For leaves #3&4, I added details and shading with my colored pencils again – see the numbers of the swatches for the colors I used.
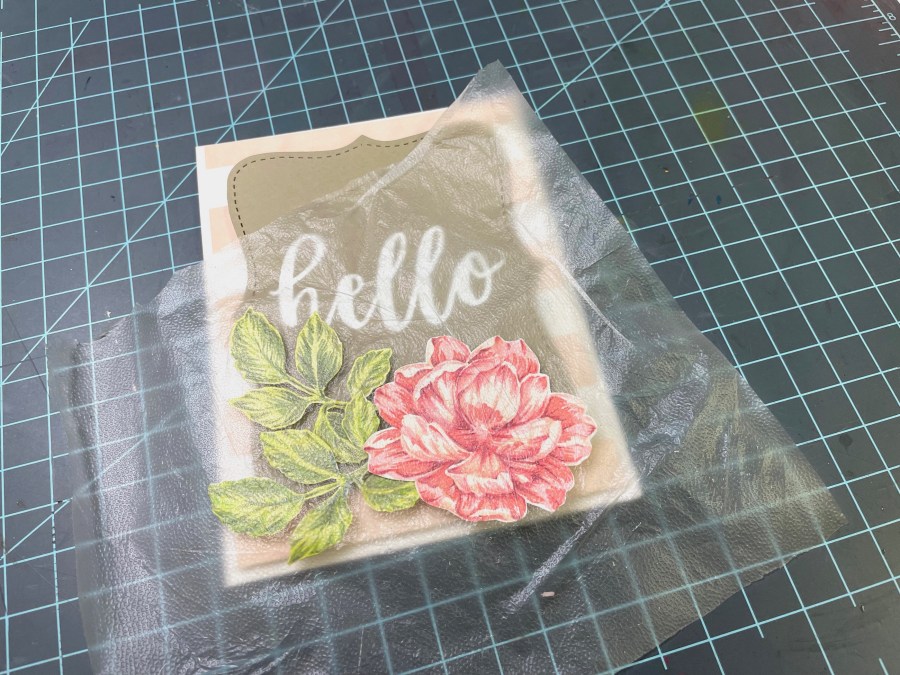
Once my focal point images were finished, I started putting together my card design.
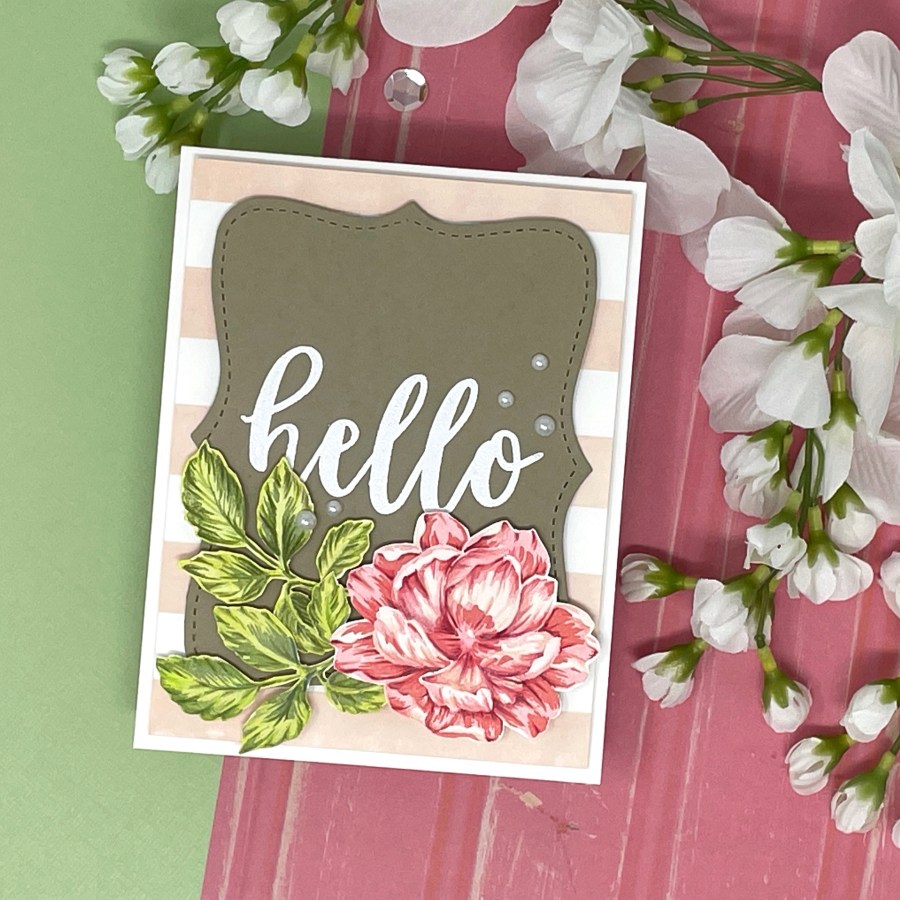
I stamped bold stripes in Blush ink on a panel of white cardstock. Then I die cut a label shape from Kraft cardstock and heat embossed the word “hello” across the front. This sentiment comes from the Blooming Bouquet set.

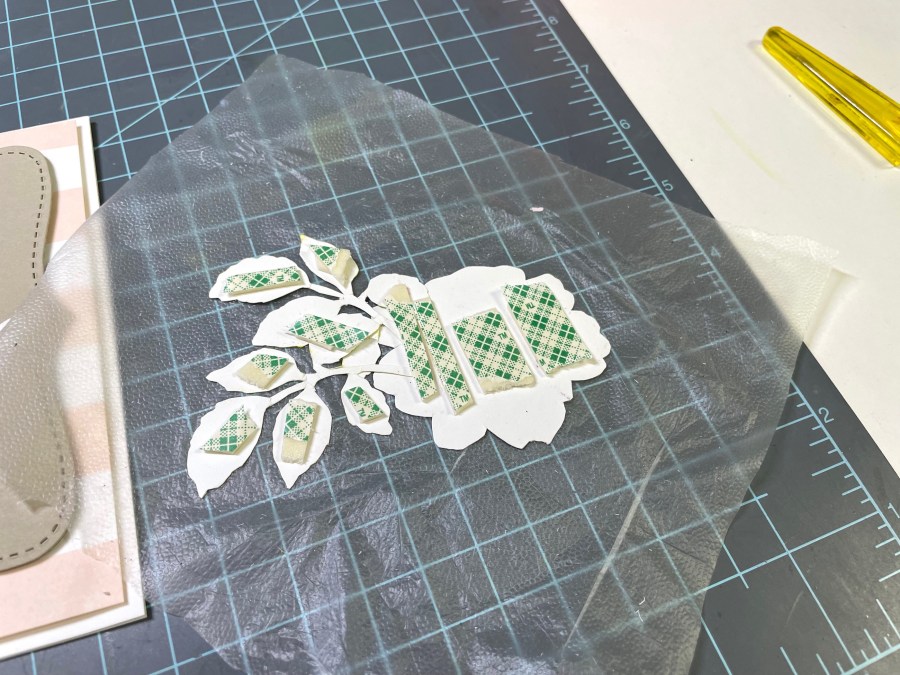
I fussy cut my flowers and leaves and arranged them on my card. I ended up using the most highly detailed flower (#4) and both detailed leaves, but I loved flower #3 also and will save it for another card – you can add as much or as little detail as you want but it all makes a big impact!
Once I was happy with the arrangement I picked up the flowers with some press ‘n seal to keep them in position. I popped up the Kraft die cut with foam tape and also backed my flower cluster with lots of foam tape.
I adhered the floral grouping to the panel and finished things off with a few pearls. I love the result and the beautiful details I added by using the techniques I learned in my class!


I hope you enjoyed this lovely card – come visit me again soon!
xo,


I love adding details to my images. I am glad you enjoyed the class as well. Beautiful work! Thank you for submitting your wonderful work to the AECP assignment gallery.