
Hello crafters!
I’m back with another assignment on my Altenew Educator Certification Program journey. I just completed a course called Magical Marker Techniques that was focused on tips and tricks using Altenew’s artist markers. I learned lots of fun new techniques and I couldn’t wait to put them to use!
We have tons of graduation parties to attend this month and one in particular for my best friend’s son. I wanted to create a youthful, masculine card for him so I started by searching online for an appropriate color palette. I came up with this image that caught my eye and I loved the color combo!
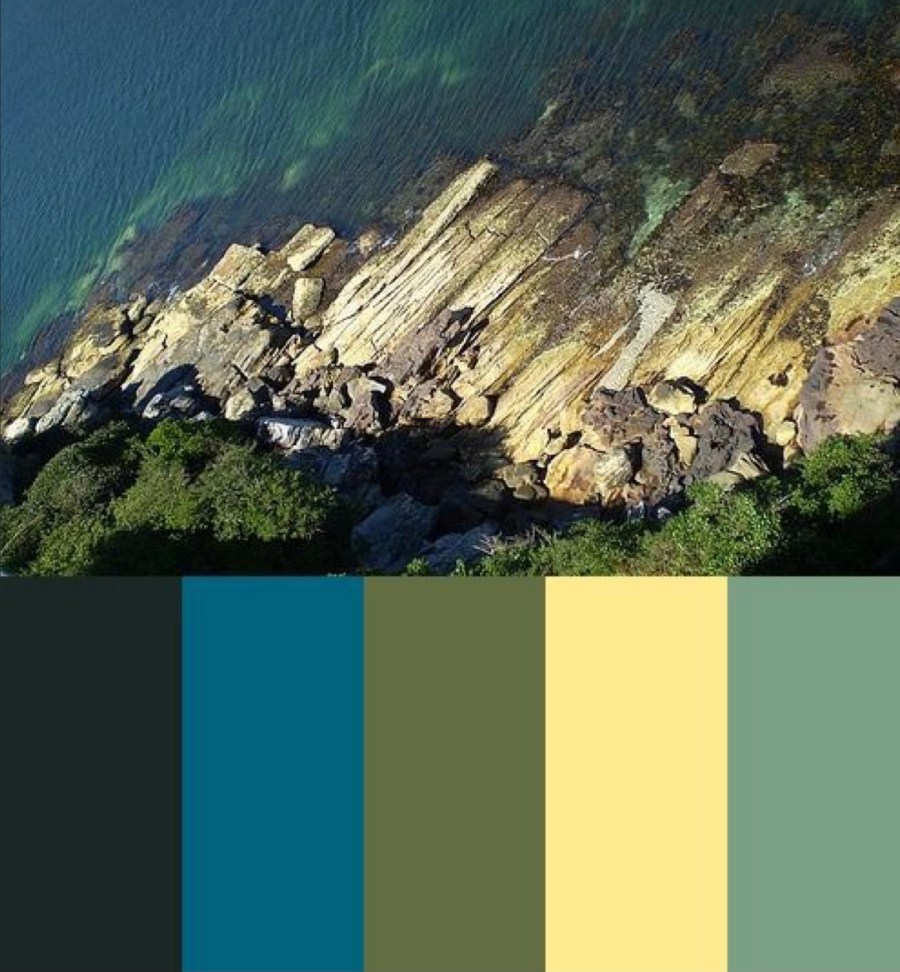
I dug through my artist markers and copics to try to match the palette as close as I could. I used Evergreen, Desert Night, Buttercream, and Moss plus a few copics.
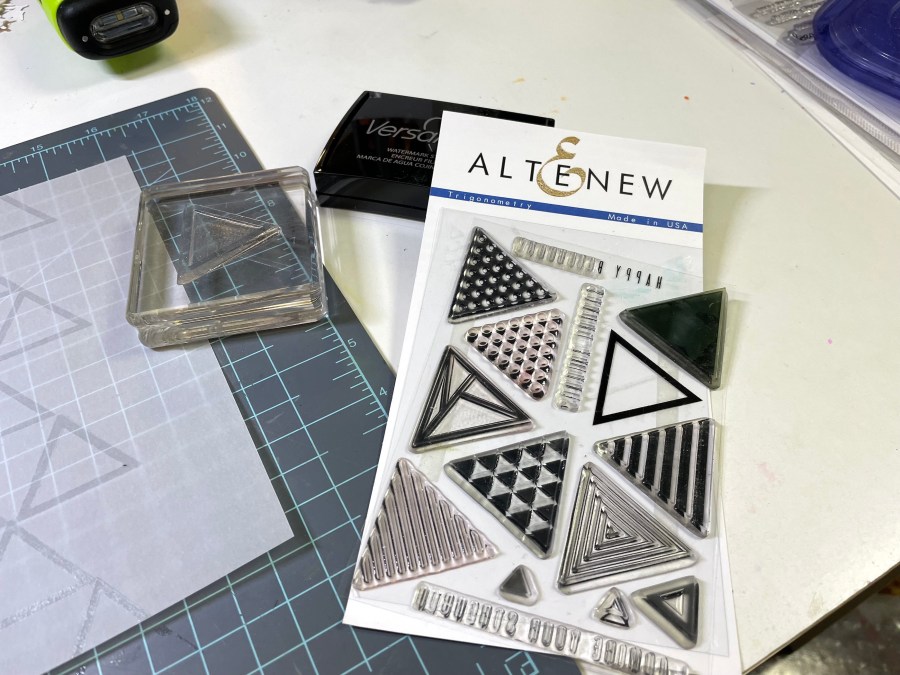
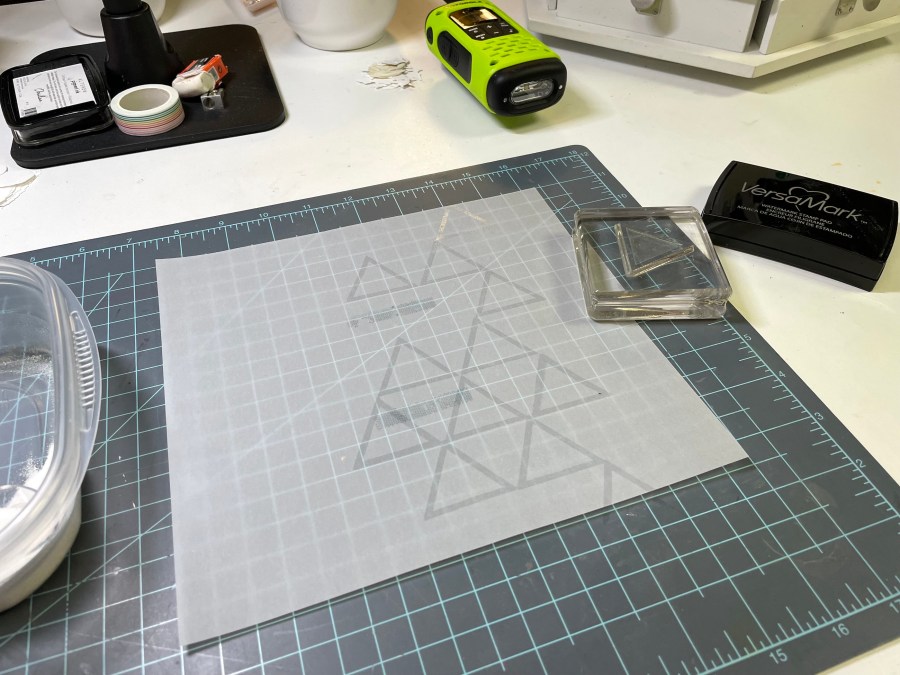
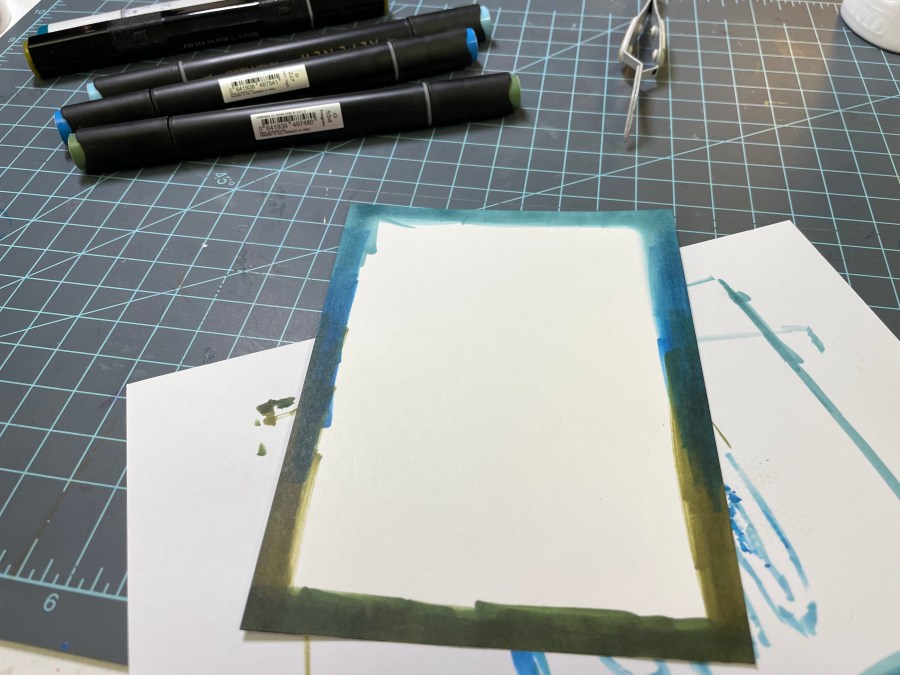
For the card design, I wanted to create an open graphic background that I could color with the markers. I pulled out one of my favorite stamp sets, Trigonometry, and a piece of heavyweight vellum. I stamped an open triangle repeatedly on the vellum with versa mark ink and embossed the triangles with white embossing powder.
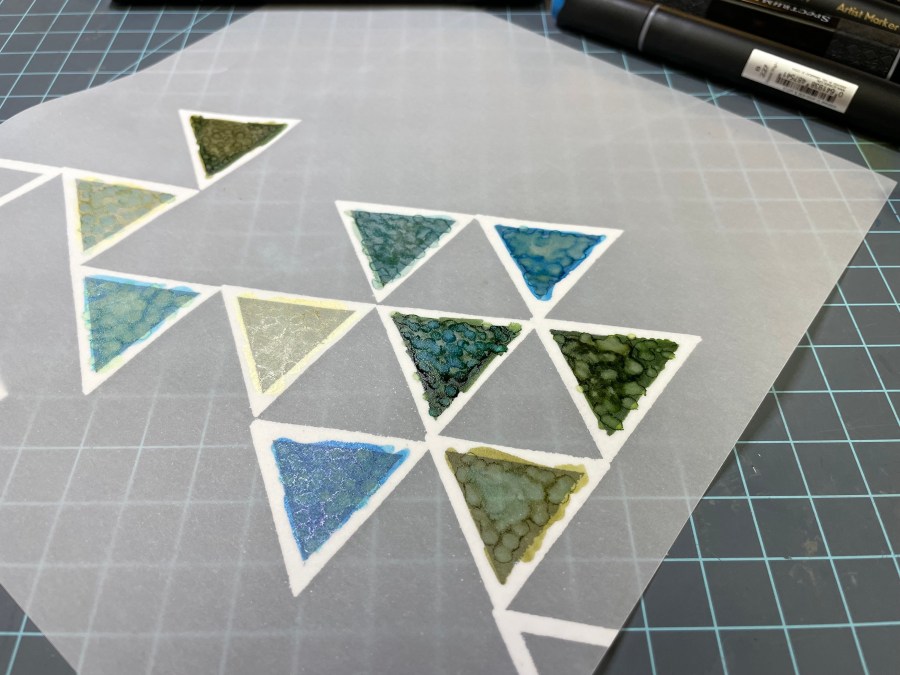
After embossing the images, I flipped the vellum over and started coloring. I wanted to create an effect I learned in class that looks earthy and marbled, almost like a geode or something – really cool!
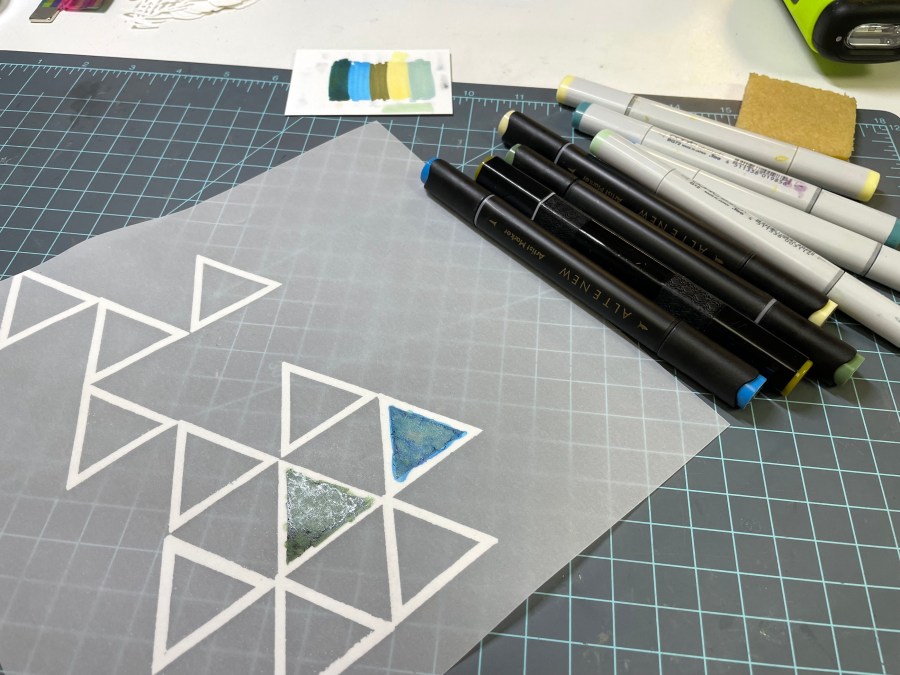
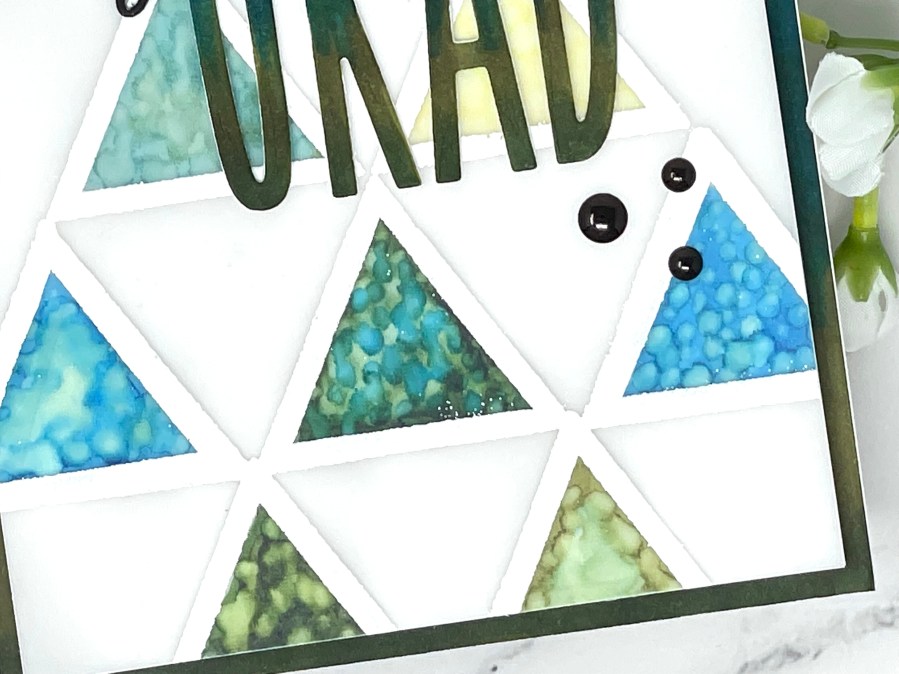
Here’s a closer look at the coloring so you can see the texture I was going for. The artist marker properties are so unique and can be used to create a variety of beautiful effects like this! You can also see that I took no care to stay in the lines since I am coloring on the back of my project. I just made sure I didn’t color outside my white embossing.

I kept alternating colors and mixing them to recreate the palette from my inspiration photo. Here’s a look at the panel once it is fully colored.
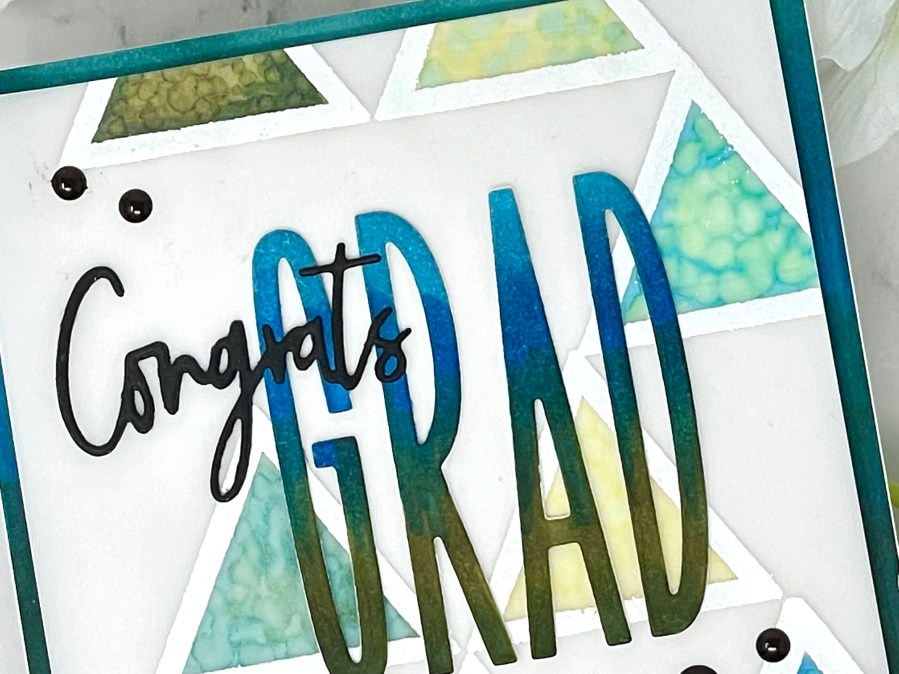
Next I got to work on my sentiment. I used an alpha die set from my stash to cut out the letters for “grad” several times from white cardstock.
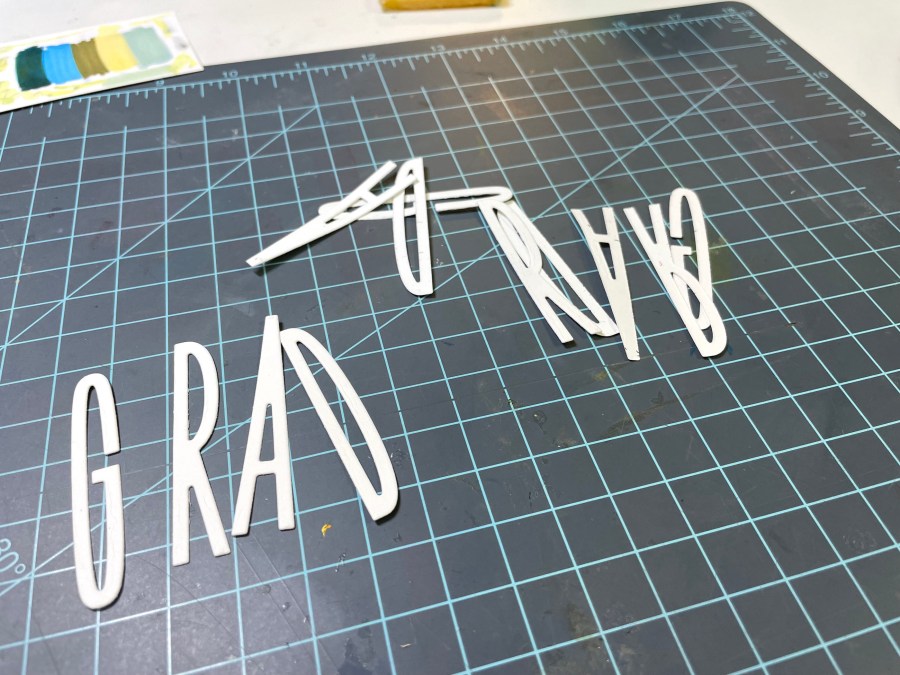
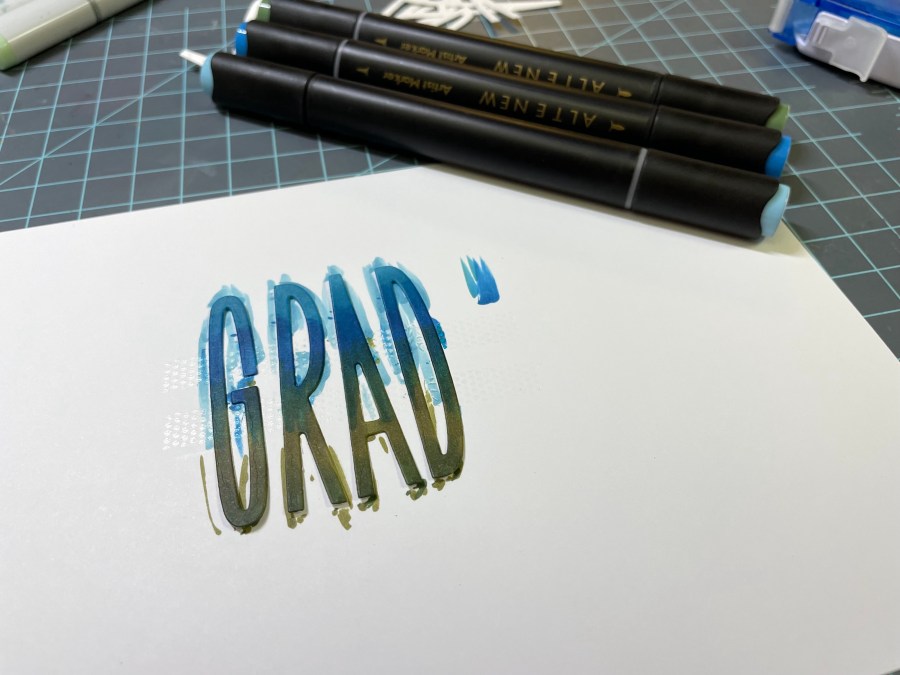
Then I used my artist markers again to color them in a gradient. I did this on a scratch piece of paper making it easier to get full coverage and a good blend.
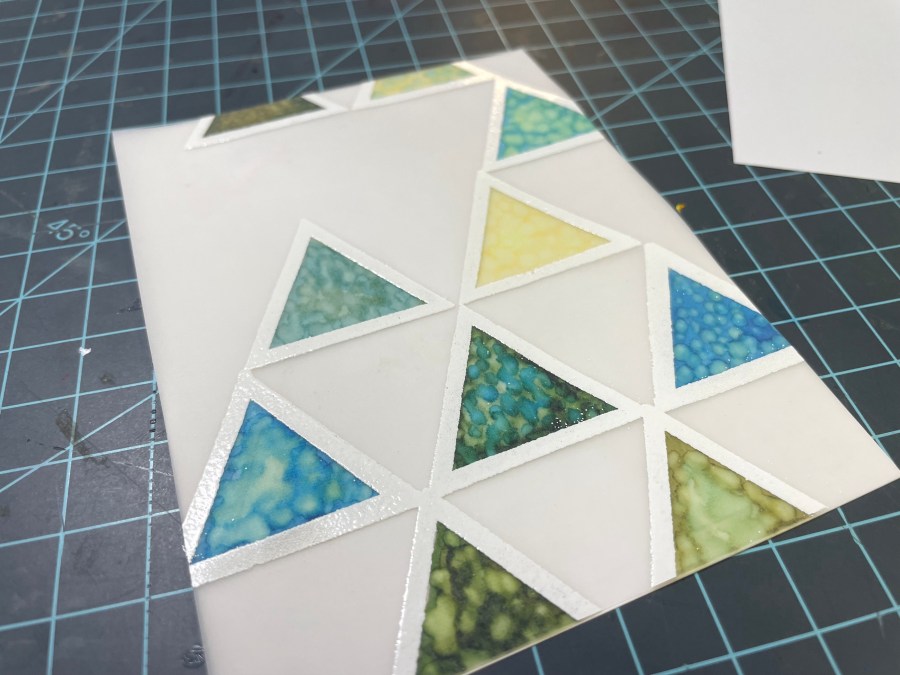
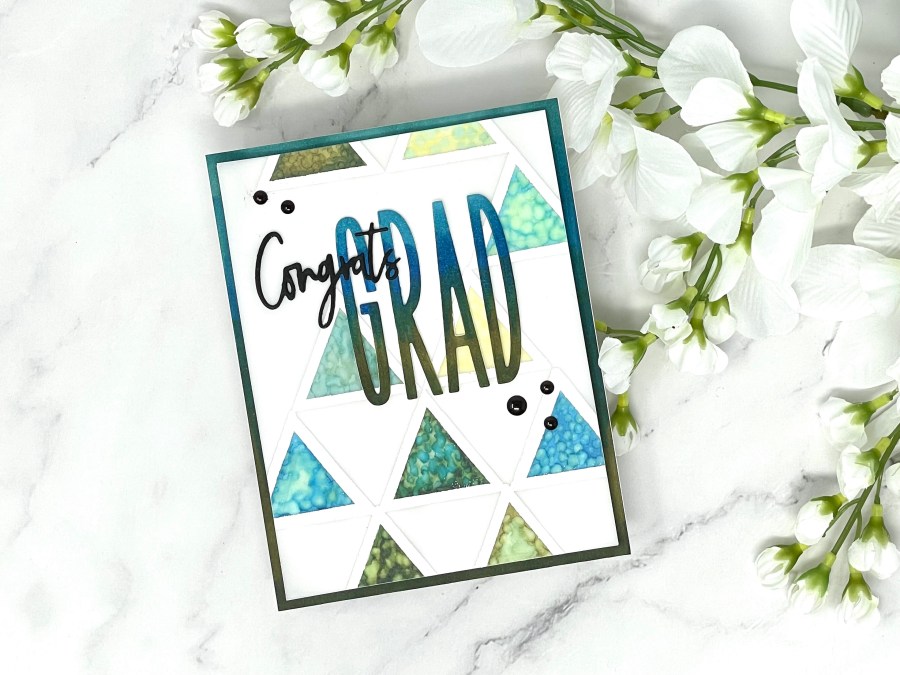
I stacked my die cut letters in 3 layers and adhered them together for dimension, with the colored layers on top. Then I trimmed down my triangle panel to cover a white card that was 4″ by 5.25″. I adhered it by using clear adhesive strips behind the colored triangles so the adhesive wouldn’t show. When you back the colored vellum with the white cardstock you can really see the colors and textures pop!
I used my creative corners tool to help my line up my letters and adhered them across the front with liquid glue. I also cut a small “congrats” using a word die in my stash and layered that on my card to complete my sentiment.

I grabbed another card panel cut to A2 size and used my artist markers to create a gradient around the outer edge that matched the gradient of my letter die cuts. I popped my triangle panel onto fun foam and then centered it on the colored cardstock to create a nice dark frame.
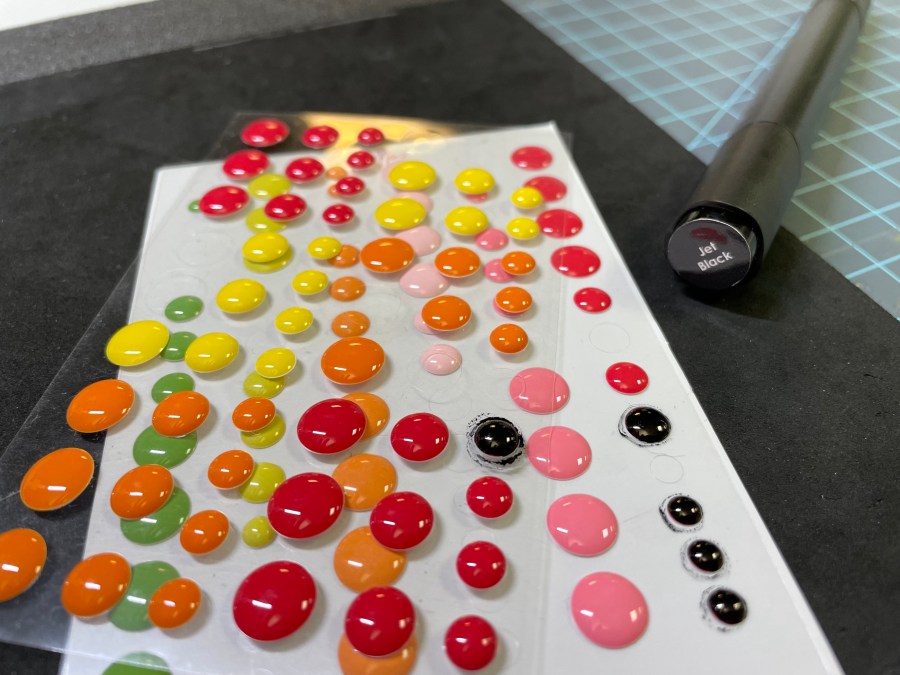
One last marker trick I used was to color some enamel dots with an artist marker to match my project. I wanted to add a few black enamel dots but I didn’t have any in the size I wanted. So I sacrificed a few colored dots and used my Jet Black artist marker to transform them. Perfecto!
So here’s another look at the completed card – funky and modern and masculine and perfect for my upcoming grad party! I just LOVE the cool texture of those colored triangles…. they do remind me of granite or some sort of natural stone – just like my inspiration photo. so striking!
I also love how using the alcohol markers allowed me to customize all my elements to match my palette and keep everything cohesive!

I hope you enjoyed this card showcasing some techniques using alcohol markers – there is so much more you can do with them besides just creating beautiful blends!
As always, I appreciate your visit to my blog and hope you stop by again soon!
xo,


Hi Tricia, I seemed to have missed commenting on this card! I love the look of it and the colours too! I think it turned out fabulous and your photo looks gorgeous too!
Thank you for submitting your wonderful work to the AECP assignment gallery. Well done!